
Gift Wrapping Idea for Toddler Books
Thursday, July 21, 2016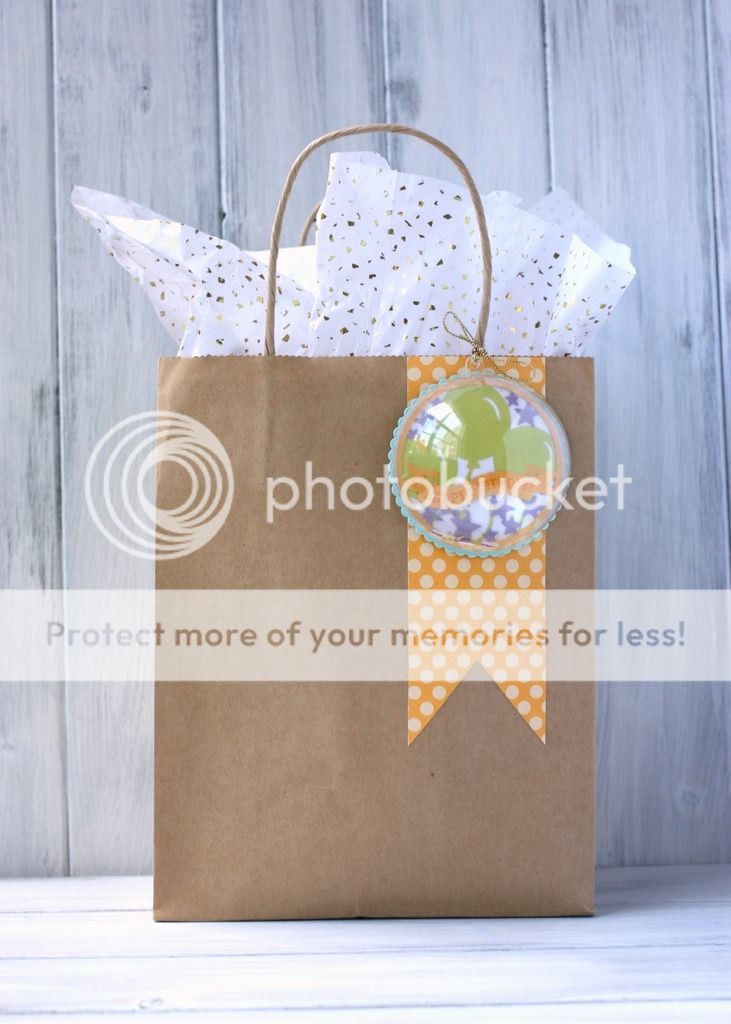
This past weekend, we celebrated the first birthday of a friend's daughter. For the birthday girl, we went with the idea of gifting her with an assortment of books, many of them Aiden's favorites.
Like I've said before, one of my favorite things about having my own kid is the fun opportunities to craft for them! In this case, it was coming up with a gift-wrapping theme, as well as the chance to use some of those crafty supplies I had bought a while ago but haven't found the chance to use yet.
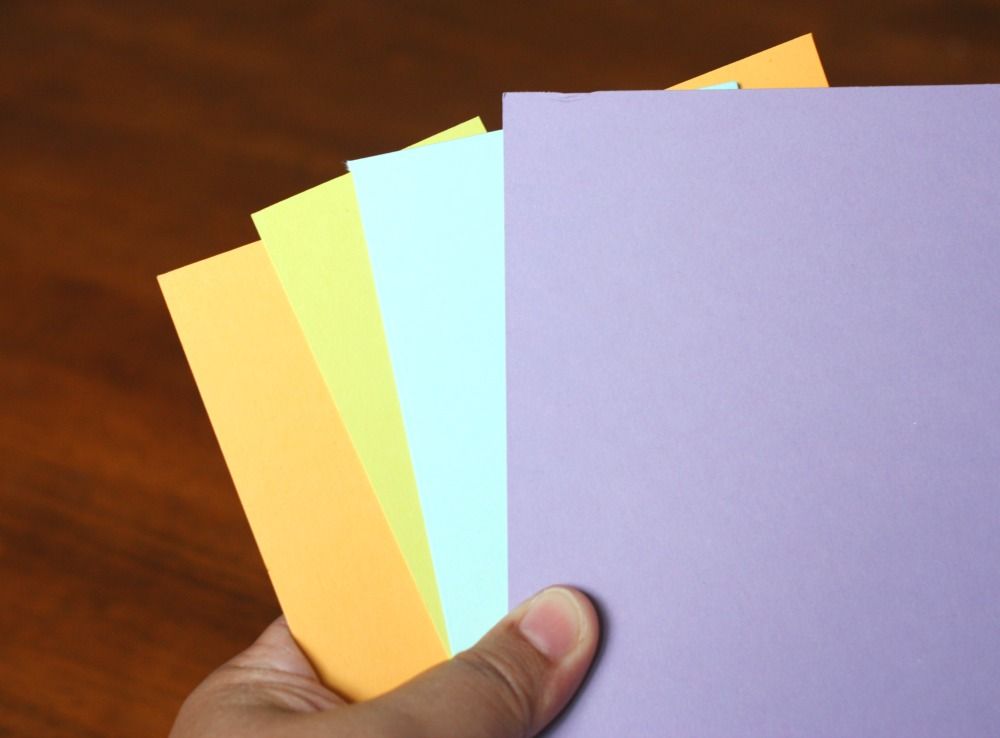
I chose a less traditional color palette for this set since I knew that the little girl's mom wasn't a big fan of pink. I used Winter Wisteria as the "girl" color and included Aqua Mist, Simply Chartreuse, and Summer Sunrise to round out the palette. They brighten things up and give the set a sort of party feeling. Great set of colors for a summertime birthday!
I started things out with a simple kraft gift bag as my base. I think I bought this one as a set of 10 from Jo-ann's a while back during one of their after-holiday sales for a really good price. This is something I do often after Christmas, loading up on basic gift bags and colorful tissue paper sets.
TIP: Buy a set of basic colored bags, like kraft, in an assortment of sizes. They provide the perfect foundation for bright and colorful packaging accents that can be tailored for any occasion.
Next, I cut a large rectangle of polka-dotted patterned paper and notched the end before using Scor-Tape to adhere it to the bag under where I planned to hang my tag. Scor-Tape is a great tape adhesive for this kind of project because it has a strong permanent hold, but adds no bulk. This is all I did to the bag itself. I planned on using the big gift tag as the main embellishment. Plus, I was running short on time.
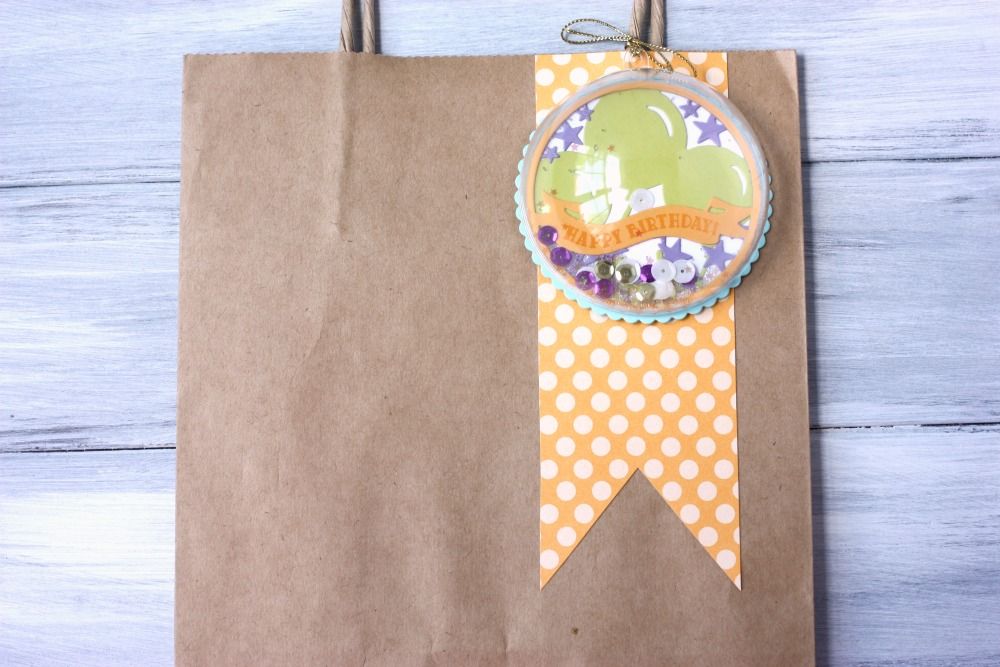
For the gift tag, I used several steel dies to assemble it. Using the Basic Backer die, with Aqua Mist cardstock, I formed the base of the tag. I then cut another backer piece out of white cardstock and trimmed the edge so I was left with only the inner circle and mounted that onto the base.
I used the Scene It: Celebration Set to add the fun party layers to the die, keeping it simple and using solid colors rather than stamping on them. To add a little sparkle, I used a Wink of Stella brush pen on some of the purple stars which is difficult to see in the photo. It added a nice subtle shimmer to them. For the last layer, the orange banner, I used a Versa Mark pad to stamp the "Happy Birthday" sentiment from the coordinating stamp set. I then heat-embossed it with clear embossing powder. I liked that it was visible, but not as obvious as if I were to use black ink. I wanted the focus to be on the sparkle.
I used the Scene It: Celebration Set to add the fun party layers to the die, keeping it simple and using solid colors rather than stamping on them. To add a little sparkle, I used a Wink of Stella brush pen on some of the purple stars which is difficult to see in the photo. It added a nice subtle shimmer to them. For the last layer, the orange banner, I used a Versa Mark pad to stamp the "Happy Birthday" sentiment from the coordinating stamp set. I then heat-embossed it with clear embossing powder. I liked that it was visible, but not as obvious as if I were to use black ink. I wanted the focus to be on the sparkle.
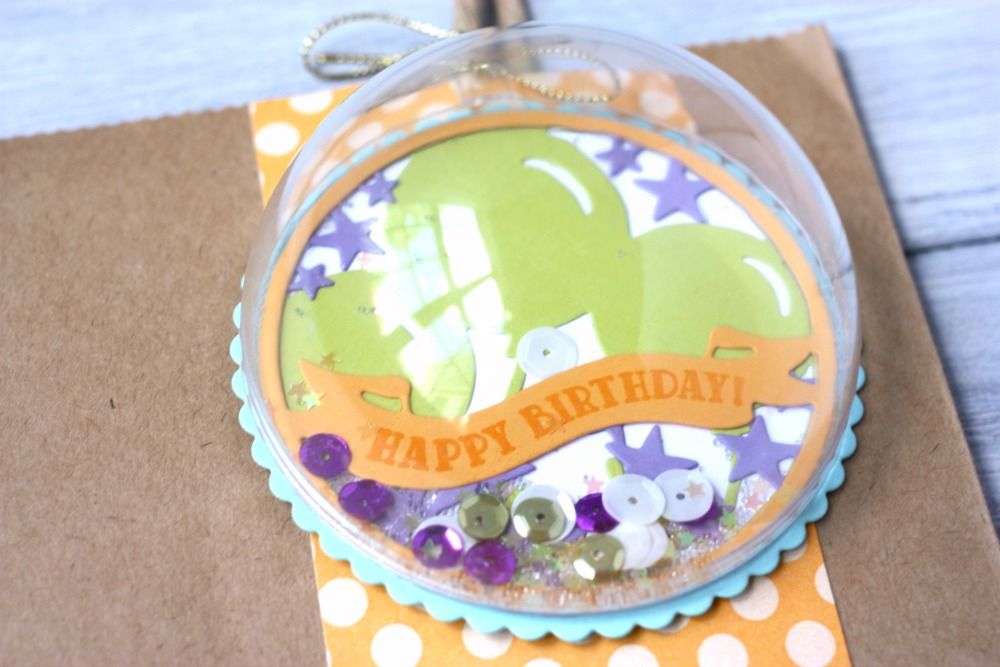
The sparkle was done by adding things like star sequins, star glitter, metallic sequins, glitter, and clear microbeads. I just placed a small amount right in the center of the tag. All of this was stuff that I've had in my stash for awhile. I like to keep an eye out for things I can use in shaker cards or tags. But still...use those crafty supplies! They've been sitting in a drawer for a while now. #makeitchallenge2016
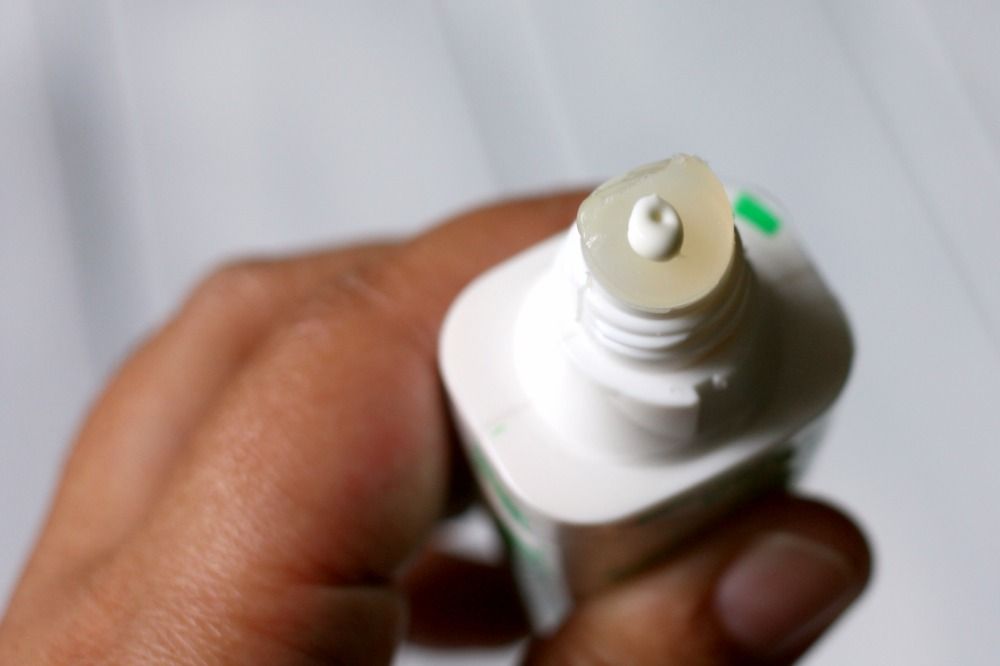
I used half of a plastic ornament to form a dome over the whole thing and glued it on using some Tombow liquid glue. This is one of my favorite glues for intricate pieces because it dries quickly and clear. I mainly use the fine tip for adding tiny dots of glue to die-cuts, but this time, I actually used the wide tip. It worked surprisingly well. I just squeezed the bottle with the wide tip pointing up. I kept squeezing until a decent amount of glue accumulated on the tip, but not so much that it started dripping over. I then twisted the edges of the plastic globe in it. It gets just enough glue to hold it on, but not so much as to glob around the edges. I also used a pointed cotton swab to sort of clean up the inside edges where there was a little too much glue. I didn't want the glitter or sequins to get stuck on the edges.
Here's the important part...once you set down the plastic dome, DO NOT SHAKE THE TAG. Let everything dry up nicely before shaking things around or you'll risk getting pieces stuck on the edges. Trust me...it's worth the wait. Conveniently enough, using the plastic globe gave me a handy spot to tie on some gold thread for hanging the tag on the bag. I found the gold thread in a dollar bin also at Jo-Ann. It's the same kind of thread found on commercially bought gift tags.
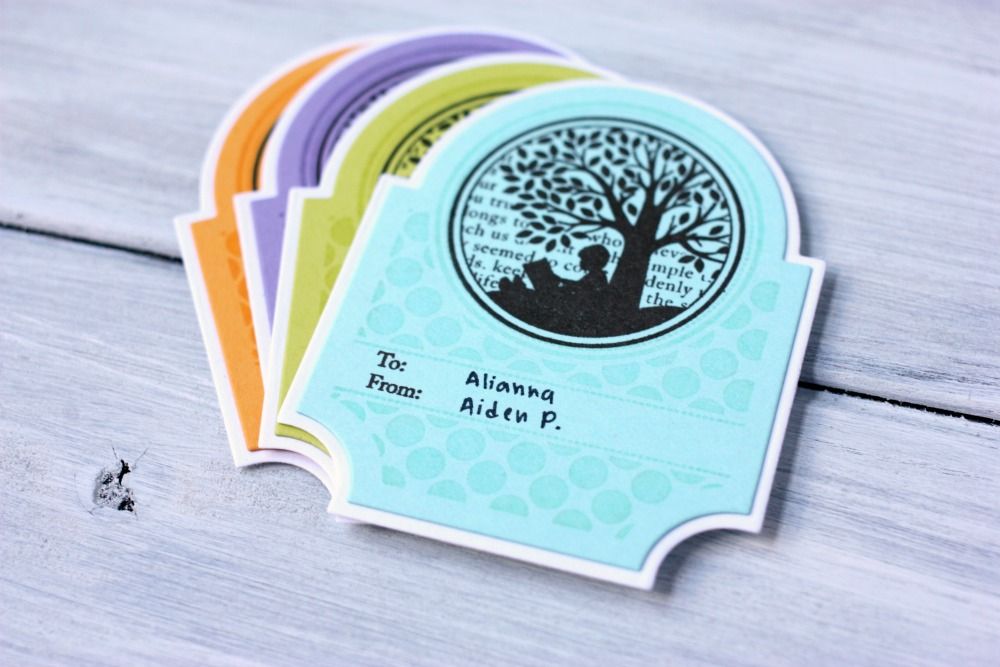
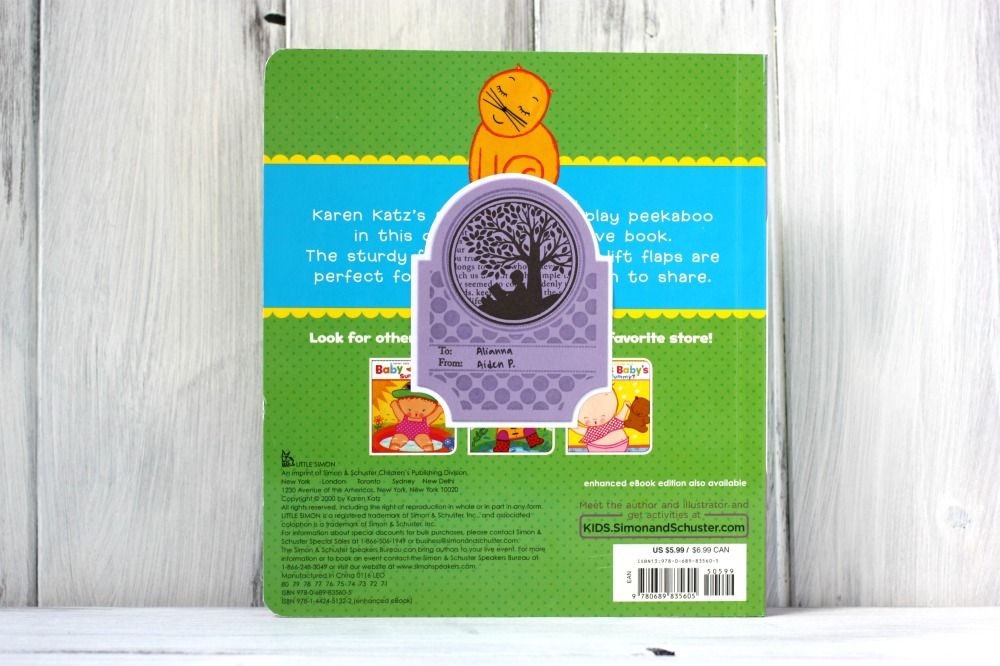
The last part of the gift wrapping were the bookplates. I've been dying to put this idea into action ever since Aiden was given his first book. I still haven't gotten around to tackling his library, but the idea is the same. I like the picture in my mind of little baby books with bookplates inside letting them know who it's from. And when he's all grown up and has a family of his own, he can pass down his baby library to his own kids. Yes...this is how I like to daydream.
For the bookplates, I started by cutting different colors of cardstock using the Mat Stack 3 die. These were then stamped with the polka-dotted stamp from the Mat Stack 3 Collection stamp set with Versa Mark ink. I let it dry for a bit since it remains slightly tacky for a while after stamping. I then used dark gray ink to stamp the image of the little child reading under the tree from the All Booked Up stamp set. I also stamped the To/From sentiment from that same set. This was all mounted with Scor-Tape onto white sticker paper that I die-cut using the Mat Stack 3 Layerz die. This made it nice and simple to stick them onto the backs of the books.
Cute, right?
Cute, right?
The books were wrapped up in some sparkly tissue paper I had left from the holidays and then put into the bag. It sounds like a lot of work when it's all written out, but I think it took me about 2 hours total to put everything together. That included some brainstorming time since I wasn't entirely sure what I wanted to do in the beginning.
I think it makes a really cute set. I hope she liked them!
 Hello! My name is Christine Portilla. I live in Southern Maryland, with my husband, our toddler son, and our fifteen-year-old cat.

0 comments